|
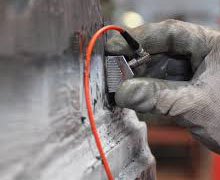
 UT uses electronic equipment which is bit complex and getting more and more operator friendly everyday. Any material which is able to transmit mechanical vibrations can be tested. UT detects both linear and non-linear flaws and three dimensional interpretation and dimensioning of indications is possible. Evaluation is rather difficult and requires very very skillful operators and interpreters. UT uses electronic equipment which is bit complex and getting more and more operator friendly everyday. Any material which is able to transmit mechanical vibrations can be tested. UT detects both linear and non-linear flaws and three dimensional interpretation and dimensioning of indications is possible. Evaluation is rather difficult and requires very very skillful operators and interpreters.
The UT instrument converts electrical pulses into mechanical vibrations or waves. These waves travel across the tested specimen via a transducer and reflect from flaws because of their different acoustic characteristics (impedance). The returning reflected waves are re-converted in to electrical pulses and displayed as signals on a cathode ray tube (CRT). The position and magnitude of these signals indicate the position and size of the flaws.
COURSE OBJECTIVE:
This course aims at imparting an in-depth knowledge of ultrasonic testing of general materials – welds, plates, castings and forgings The course concentrates on equipments and accessories including various probes, their application techniques, evaluation of screen signals, Various standards, codes and procedures for UT etc.
COURSE CONTENT (Modified as per client’s job needs):
Nature of sound; Wave types; Relationship among frequency, wavelength, velocity; Production of ultrasonic waves; Piezo-electric effect; Crystals; Different Piezo-electric materials; Ultrasonic testing probes, transducers; Probe construction and different types of probes; Ultrasonic Pulse; Damping and effect on pulse characteristics by damping; Pulse-echo / Through transmission techniques and their applications and suitability; Behavior of different waves in different materials; The nature of ultrasonic beam and its various sectional properties; Near and far zones, Dead zone; Relationship among beam spread / crystal size / frequency; Acoustic interface; Reflection and refraction; Snell’s law; Acoustic velocities in different materials and their effect on wave behavior; Mode conversion; Ultrasonic flaw detector and UT thickness gage; Cathode ray tube as display unit; Decibel and intensity / amplitude relationship; Factors influencing ultrasonic testing: Surface condition, Acoustic impedance, Transmission v/s reflection; Importance of couplant; Sensitivity/accuracy/precision; Beam paths and skip distances; Interpreting signals on CRT, Locating and identifying reflectors; Sizing reflectors; Limitations of ultrasonic testing; Immersion and automated UT, Report requirements, Procedures & Written Practices -Various Codes: ASME Section V, API 1104, AWS D1.1 etc
Practical’s
Introduction to UT equipment, It’s various functions and control knobs, Plotting the inspection job profile, Probe and equipment set up selection, Scanning method and extent, Detecting/sizing/locating flaws; Reporting.
|